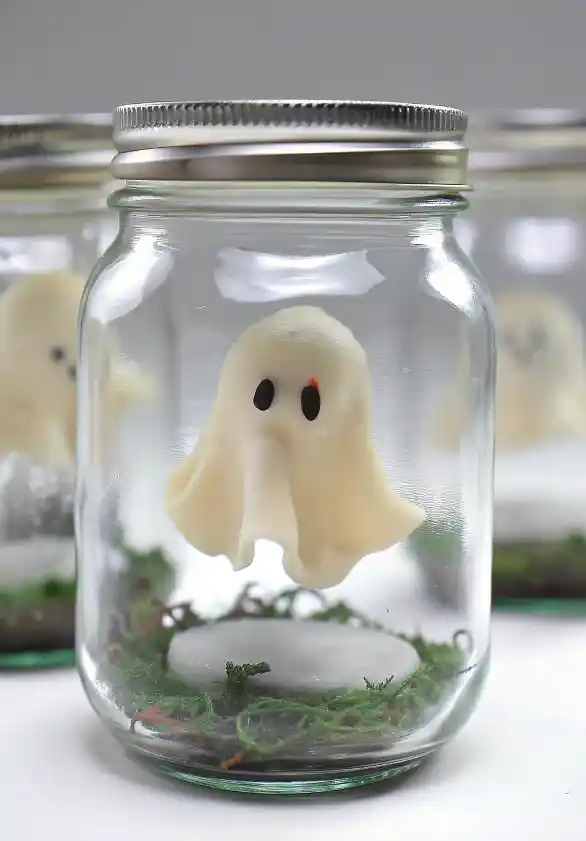
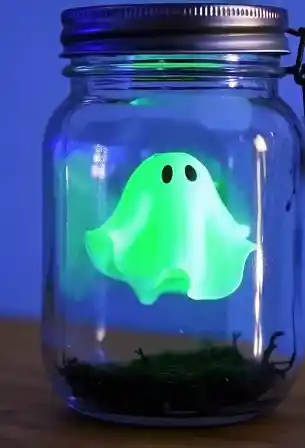
It all started on a rainy October afternoon. My youngest, Ella, looked up at me with those big, curious eyes and asked, “Mama, do ghosts get cold?” I smiled, stirred the soup on the stove, and said, “Only if they don’t have a cozy jar to live in.” She giggled — and just like that, our new favorite Halloween tradition was born: the Ghost in a Jar.
This little craft has quickly become a family favorite. It’s affordable, surprisingly easy, and endlessly charming. And the best part? You can make it from supplies you probably already have around the house. So gather the kids and your glue gun — we’re about to bottle up some spooky fun.
What You’ll Need
- Small mason jar (8 to 16 oz works best — think salsa jar)
- White polymer clay or air-dry clay
- Black beads or tiny bits of black clay for the eyes
- Fishing line or clear thread
- Poly-fill stuffing or cotton balls (for the foggy base)
- Green moss or faux grass (dollar store, or reuse old decor)
- Felt or fabric for the lid cover
- Glue gun or strong craft glue
- Toothpick or skewer
- Optional: glow-in-the-dark paint or clay
Step-by-Step: How to Make a Ghost in a Jar
1. Shape Your Ghost
Start by rolling your white clay into a ball about the size of a golf ball. Flatten it into a circle, then gently pinch and shape the edges to create a ruffled “ghost sheet.” Press the center upward slightly to form the body of the ghost. Think of the shape like a soft, homemade Pac-Man ghost.
Add two small eyes using black beads or tiny clay balls. Finally, use a toothpick to poke a small hole at the top of the ghost’s head — this is where the fishing line will go later.
Tip: Air-dry clay works well too, especially for kids, though it can be a bit more fragile.
2. Bake or Dry the Ghost
If using polymer clay, bake according to the instructions on the package (usually 15 minutes at 275°F for 1/4 inch thickness). Let it cool completely before handling.
3. Build the Foggy Base
Cut a circle of felt to match the size of your jar lid. Glue on a small amount of moss and poly-fill to create a soft, misty base for the ghost. This gives the illusion of the ghost floating above fog-covered ground.
4. Hang the Ghost
Thread a piece of fishing line through the hole in your ghost. Tie a small bead inside the ghost to stop it from slipping off. Then poke a small hole in the center of your jar lid and pull the other end of the fishing line through it.
Adjust the line so the ghost appears to float in the center of the jar. Tape or tie off the extra line outside the lid to secure it.
5. Seal the Jar
Carefully place your ghost inside the jar and close the lid. Cover the lid with fabric, felt, or a cute paper circle. Tie with twine or ribbon for extra detail.
Add a small tag with a Halloween message like “Pet Ghost Inside” or “Do Not Open Until Midnight.”

Optional Additions
- Use glow-in-the-dark clay or paint for an extra spooky effect
- Add a tiny witch hat, mini pumpkin, or a wand
- Place plastic spiders or glittery stars inside the jar
- Paint the jar with spooky designs using paint pens or markers
Why We Love It
The Ghost in a Jar craft is more than just a seasonal decoration. It’s a sweet, screen-free moment with your kids. It’s creativity without chaos. It’s something small that makes the season feel just a bit more magical.
And with supplies you likely have on hand — or can grab from the dollar store — it’s also a budget-friendly win.
Final Thoughts
If you’re looking for a Halloween project that’s low-mess, kid-friendly, and full of cozy charm, this Ghost in a Jar checks all the boxes. It’s simple enough for little hands, cute enough for your shelf, and meaningful enough to become a treasured tradition.
Because sometimes, the best Halloween memories aren’t the loudest or the most expensive. Sometimes, they’re as small and simple as a little ghost, floating quietly in a jar.
For more recipes follow me in Facebook and Pinterest

Ghost in a Jar
Ingredients
Method
- Roll white clay into a ball about the size of a golf ball, then flatten and shape it into a ruffled ghost shape.
- Form a dome in the center for the ghost’s head. Think ‘Pac-Man ghost’ shape.
- Add eyes using black beads or tiny black clay balls.
- Use a toothpick to poke a small hole at the top of the ghost’s head for the fishing line.
- If using polymer clay, bake the ghost per package instructions (typically 15 minutes at 275°F for ¼ inch thickness). Let it cool completely.
- Cut a felt circle to fit the lid of your jar. Glue on moss and poly-fill to create a foggy base.
- Thread fishing line through the hole in the ghost and tie a small bead inside to prevent slipping.
- Poke a hole in the center of the jar lid and pull the fishing line through, adjusting the ghost to float in the jar.
- Secure the fishing line by tying or taping it outside the lid.
- Place the ghost inside the jar and screw on the lid carefully.
- Cover the lid with fabric or felt, and tie twine or ribbon around it for decoration.
- Optional: Add a tag that says “Pet Ghost Inside” or “Do Not Open Until Midnight.”
