Description
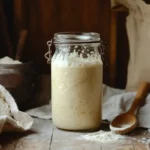
Starting your own sourdough starter is simpler than you think! With just flour, water, and patience, you can create a natural yeast culture that will help you bake delicious sourdough bread for years to come. Follow this easy step-by-step guide to grow and maintain a strong and active starter.
Ingredients
Scale
½ cup whole wheat flour (can substitute with rye or all-purpose)
¼ cup filtered or dechlorinated water
Instructions
- Day 1: In a clean glass jar, mix ½ cup whole wheat flour with ¼ cup filtered water. Stir well until smooth. Cover loosely and leave it at room temperature.
- Day 2: You may see tiny bubbles—this means fermentation has started! Discard half the mixture and feed it again with the same amount of flour and water.
- Days 3-5: Continue the feeding process every 24 hours. By now, your starter should be bubbling and developing a slightly tangy smell.
- Day 6 or 7: If your starter doubles in size within 4-6 hours after feeding, it is now active and ready for baking!
Notes
- If your starter isn’t rising well, try placing it in a warmer spot (75-80°F).
- Rye flour can help speed up fermentation if your starter seems sluggish.
- If you notice a layer of liquid (hooch), just stir it in or discard it before feeding.
- Prep Time: 5 minutes
- Category: Breakfast
- Method: Fermentation
- Cuisine: Bread Baking
Nutrition
- Serving Size: Per 1 tbsp of starter
- Calories: 15 kcal
- Sugar: 0g
- Sodium: 0mg
- Fat: 0g
- Saturated Fat: 0g
- Unsaturated Fat: 0g
- Trans Fat: 0g
- Carbohydrates: 3g
- Fiber: 0.5g
- Protein: 0.5g
- Cholesterol: 0mg
Keywords: Sourdough starter, homemade sourdough, how to take care of sourdough starter, sourdough fermentation, natural yeast, feeding sourdough starter