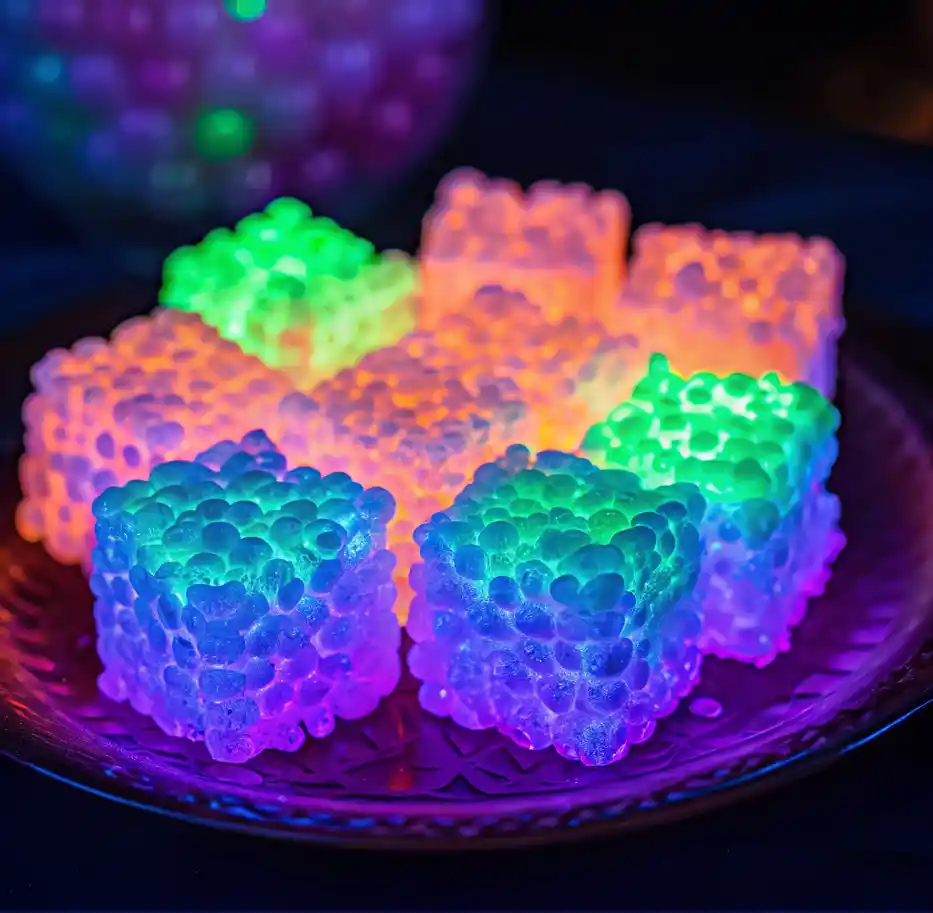
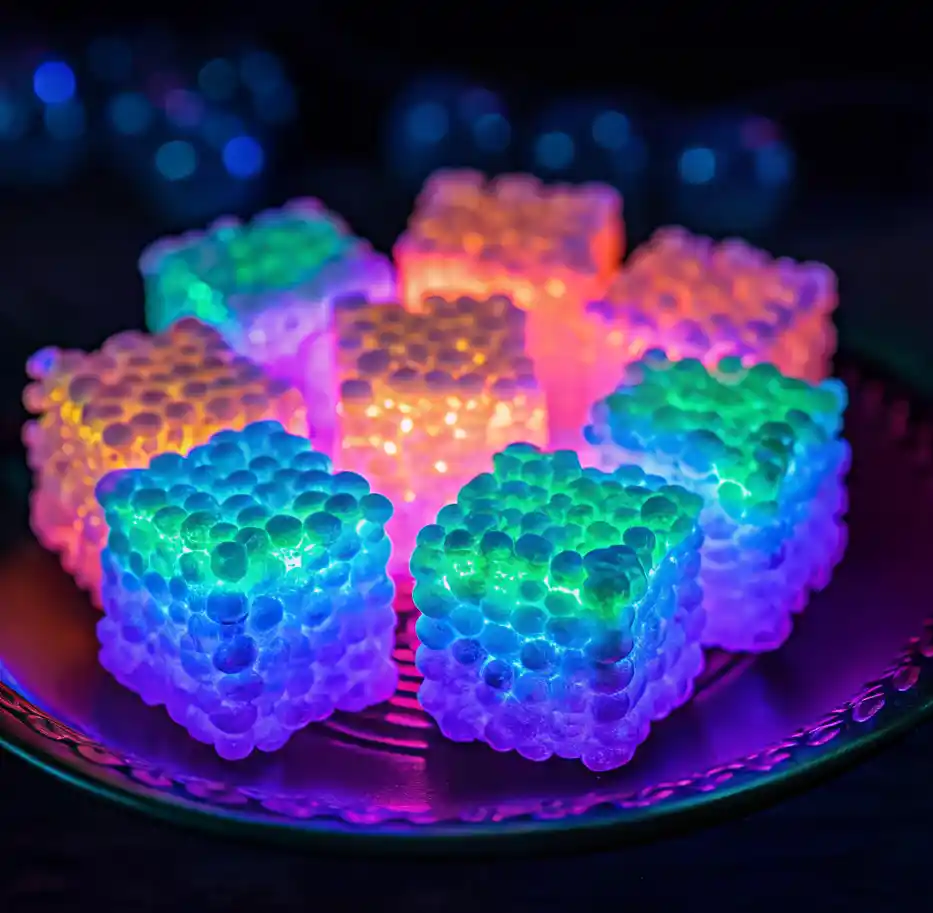
It was one of those gloomy fall Saturdays where the rain taps gently on the windows and the kids are bouncing off the walls by 10 AM. I was just about to hand them the remote when my youngest asked, “Mom, can we make something fun?” Translation: messy, sweet, and involving zero vegetables.
So I raided the pantry—marshmallows, check. Rice Krispies, check. Butter? Always. Then I remembered a half-used bottle of tonic water leftover from a grown-up night that never happened and a pack of neon food coloring from a cupcake phase. “Wanna make science treats?” I asked.
And that’s how Glow in the Dark Rice Krispies Treats became a rainy-day tradition at our house.
Why You’ll Love This Budget-Friendly Glow Recipe
- No fancy ingredients. You likely already have most of these on hand.
- Glow-in-the-dark magic. Science meets snacktime under a blacklight.
- Kid-approved and adult-impressed. Great for Halloween, birthdays, or classroom demos.
- Economical & easy. One pan, a few pantry staples, and done in under 30 minutes (plus cooling time).

Ingredients
- 6 cups Rice Krispies cereal (store-brand works just as well!)
- 4 cups mini marshmallows
- 3 tablespoons butter
- 1/4 cup tonic water (must say “quinine” on the label)
- Neon food coloring (optional, but so fun—green glows the best!)
A Quick Science Note
Why do they glow? It’s all thanks to quinine in the tonic water. It fluoresces under UV (black) light. So, no glow without a blacklight. But once the lights go out, BAM—your treats light up like edible glow sticks.
How to Make Glow in the Dark Rice Krispies Treats
1. Prep Your Pan.
Grease a 9×13 baking dish with butter or cooking spray. You can also use silicone molds for spooky or fun shapes (we’ve done ghosts, stars, even dinosaurs!).
2. Melt the Butter & Marshmallows.
In a large saucepan over low heat, melt the butter. Add marshmallows and stir until smooth and gooey.
3. The Glow Step.
Remove the pot from heat and quickly stir in the tonic water. It might look a little frothy—totally normal.
4. Add Color.
Divide the mixture into bowls if you’re going multicolor. Add a few drops of neon food coloring to each and stir. Green and blue glow best!
5. Mix in Cereal.
Stir in Rice Krispies until evenly coated. This part can get sticky—grease your spoon or hands.
6. Press and Set.
Press mixture into your pan or molds using greased parchment paper. Let cool for 1–2 hours.
7. The Reveal.
Once set, cut into squares, turn off the lights, flip on a blacklight, and bask in the glow of your DIY dessert success.
Fun Variations
- Halloween Vibes: Use bat or pumpkin molds and orange coloring.
- Galaxy Swirls: Marble blue, purple, and pink for an outer-space glow.
- Candy Mix-ins: Add popping candy or glow-colored sprinkles on top.
Tips from a Budget-Minded Mom
- Use store-brand cereal & marshmallows. No one can tell the difference once they glow.
- Don’t overheat. Low and slow makes for gooey, soft treats.
- Grease everything. Your hands, the spoon, the counter—trust me.
- Use fresh marshmallows. Old ones won’t melt right.
- Store in an airtight container. Best eaten within 48 hours (but they probably won’t last that long).
FAQ – You Asked, I Answered
Q: Do these treats actually glow in the dark?
A: Not quite! They don’t glow on their own in total darkness. The glow effect only works under a UV blacklight, thanks to an ingredient called quinine found in tonic water. When quinine is exposed to UV light, it fluoresces, creating that cool bluish glow. So be sure to have a blacklight on hand for the full effect!
Q: What kind of tonic water should I use?
A: Look for regular tonic water that clearly states “contains quinine” on the label. Avoid flavored sparkling waters or diet mixers unless they specifically include quinine. Without it, the treats won’t glow under blacklight.
Q: Will tonic water change the flavor of the treats?
A: It may add a slightly bitter or citrusy aftertaste, but the sweetness of marshmallows usually overpowers it. Most kids (and even picky adults) don’t notice it at all. If you’re worried, use less tonic water and balance it with a drop of vanilla or citrus extract.
Q: Can I skip the tonic water?
A: Yes—but they won’t glow. If you’re just going for bright, fun colors (and not the glow), you can leave out the tonic water and simply use neon food coloring. They’ll still look festive, just without the science twist.
Q: Can I use diet tonic water?
A: Yes! As long as it contains quinine, diet tonic water works just as well for the glowing effect. It may slightly affect the flavor, but it’s still sweetened and totally usable in this recipe.
Q: How long do these treats stay fresh?
A: They taste best within 48 hours. Store them in an airtight container at room temperature. After a couple of days, they may become hard or lose their chewy texture—especially if left uncovered.
Q: Can I freeze Glow in the Dark Rice Krispies Treats?
A: Freezing is not recommended. The texture changes (they can become soggy or too hard when thawed), and the glowing effect might be reduced due to moisture. It’s best to make and enjoy them fresh.
Q: Can I make these treats ahead of time for a party?
A: Absolutely! Make them the night before your event, store them in a sealed container, and keep them at room temperature. Just remember to bring your blacklight so guests can enjoy the glow!
Q: Are these safe for small children?
A: Yes, though tonic water should be used in moderation due to quinine. The small amount used in this recipe (¼ cup spread across an entire pan) is generally considered safe for kids. But if you have concerns, consult your pediatrician or skip the tonic water and just use food coloring for the effect.
Q: What’s the best food coloring to use?
A: Neon or UV-reactive food coloring works best. Bright green, yellow, blue, and pink glow the most under blacklight. Gel food coloring offers more vibrant results, but liquid works too.
Q: Can I turn these into shaped treats?
A: Yes! Use silicone molds or cookie cutters (spray them with cooking spray) to create themed shapes like pumpkins, stars, ghosts, or even letters for name customization. Just press the warm mixture into the molds and let them cool.
For the Classroom or Kitchen Table
Want to sneak in a little education? Talk to your kids about fluorescence and UV light while you stir and mix. Turn dessert into a mini science lesson they won’t forget—and will probably ask to repeat next weekend.
Final Thoughts
Glow in the Dark Rice Krispies Treats are more than just a snack—they’re a memory waiting to happen. Whether you’re hosting a party or just trying to rescue a rainy afternoon, this recipe brings fun, science, and a bit of glow to your day.
From one practical, mess-loving kitchen to yours—go ahead and let it glow.
For more recipes follow me in Facebook and Pinterest

Glow in the Dark Rice Krispies Treats
Ingredients
Method
- Grease a 9×13 baking dish with butter or cooking spray. Silicone molds can also be used for fun shapes.
- In a large saucepan over low heat, melt the butter. Add marshmallows and stir until smooth.
- Remove the pot from heat and stir in tonic water quickly. It may look frothy—this is normal.
- If using food coloring, divide the mixture into bowls and add a few drops of neon color to each. Stir to combine.
- Stir in Rice Krispies cereal until evenly coated. Grease your spoon or hands to help with sticking.
- Press the mixture into the prepared pan or molds using greased parchment paper. Let cool for 1–2 hours.
- Once set, cut into squares. Turn off the lights and use a blacklight to see them glow!

